I got an Xbox 360 Kinect for $3 at a thrift store. Great find, except I do not have an Xbox 360 around.
There are two ways to write about projects like this.
One is: here is a demo, here is a screenshot, here is the repository.
The other — which I find more useful — is to explain why the demo exists at all, what signal it is using, what the failure modes are, and why the implementation looks the way it does.
This post is about the second thing.
Setup
Obviously, the Kinect uses a whole bunch of proprietary Microsoft software from ages ago. However, I am forever indebted to the fact that so many people have reverse engineered the device and compiled libfreenect.
On macOS:
brew install libfreenect
Then attach libfreenect to CMakeLists:
cmake -S wrappers/cpp/blog_demos -B build-blog-demos \
  -DCMAKE_PREFIX_PATH="$(brew --prefix)"

cmake --build build-blog-demos
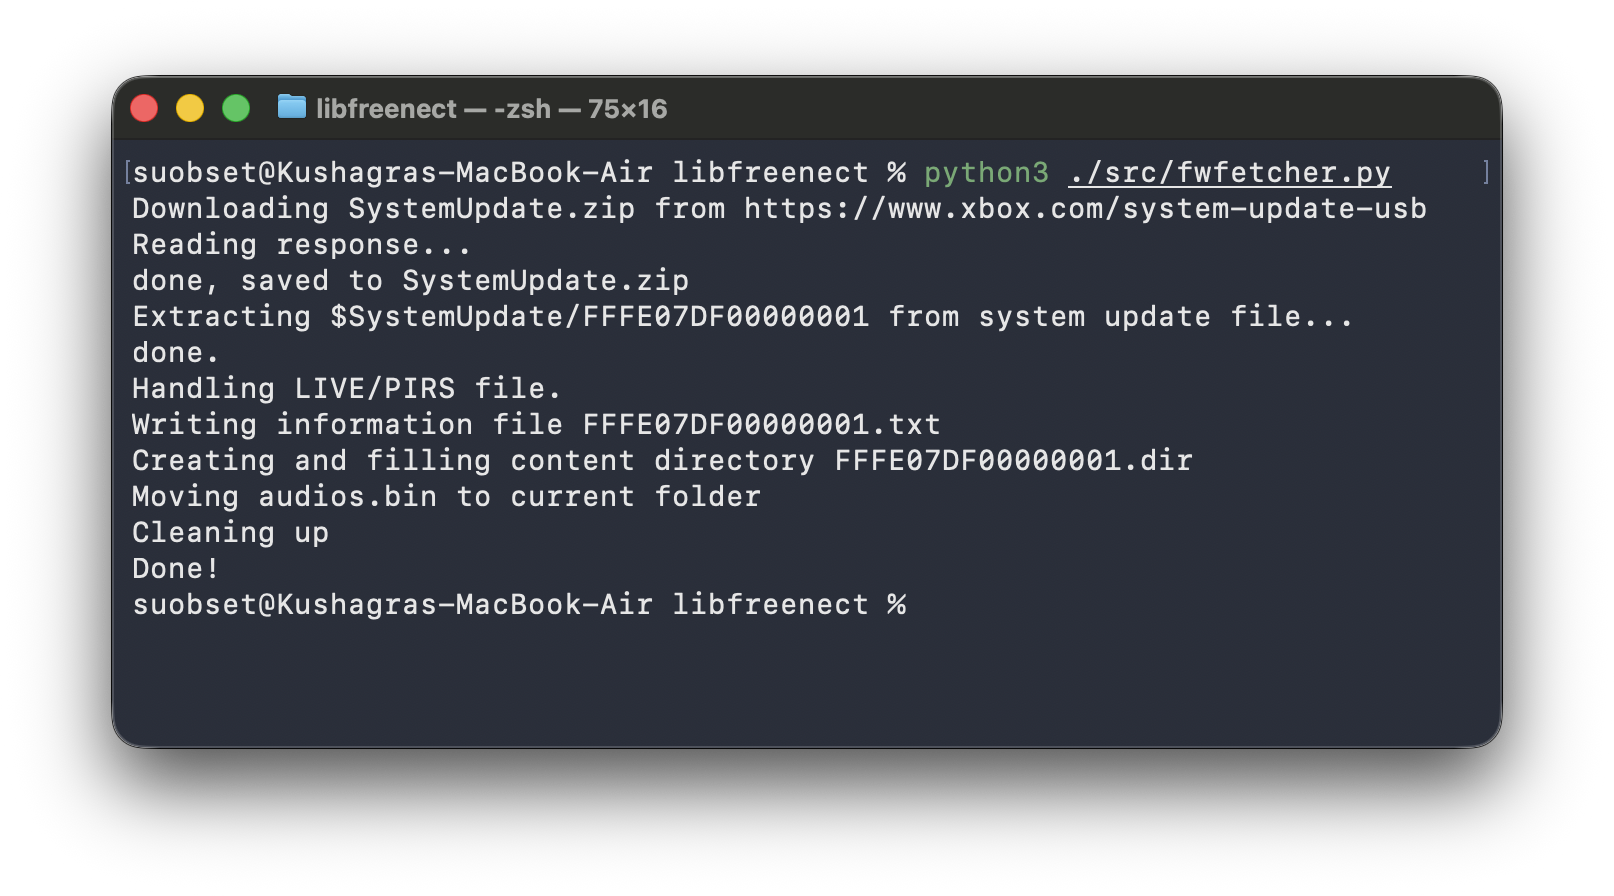
You also need audios.bin. Thankfully, libfreenect provides fwfetcher.py to download that for you.
python3 fwfetcher.py
mv audios.bin ~/.libfreenect/
Side note: There is a Cython wrapper for libfreenect as well. However, I could not get it to work as seamlessly as C++, and I feel more comfortable in C++ land. Hence, this post + demo is on C++ 17, using CMake and a Clang on macOS.
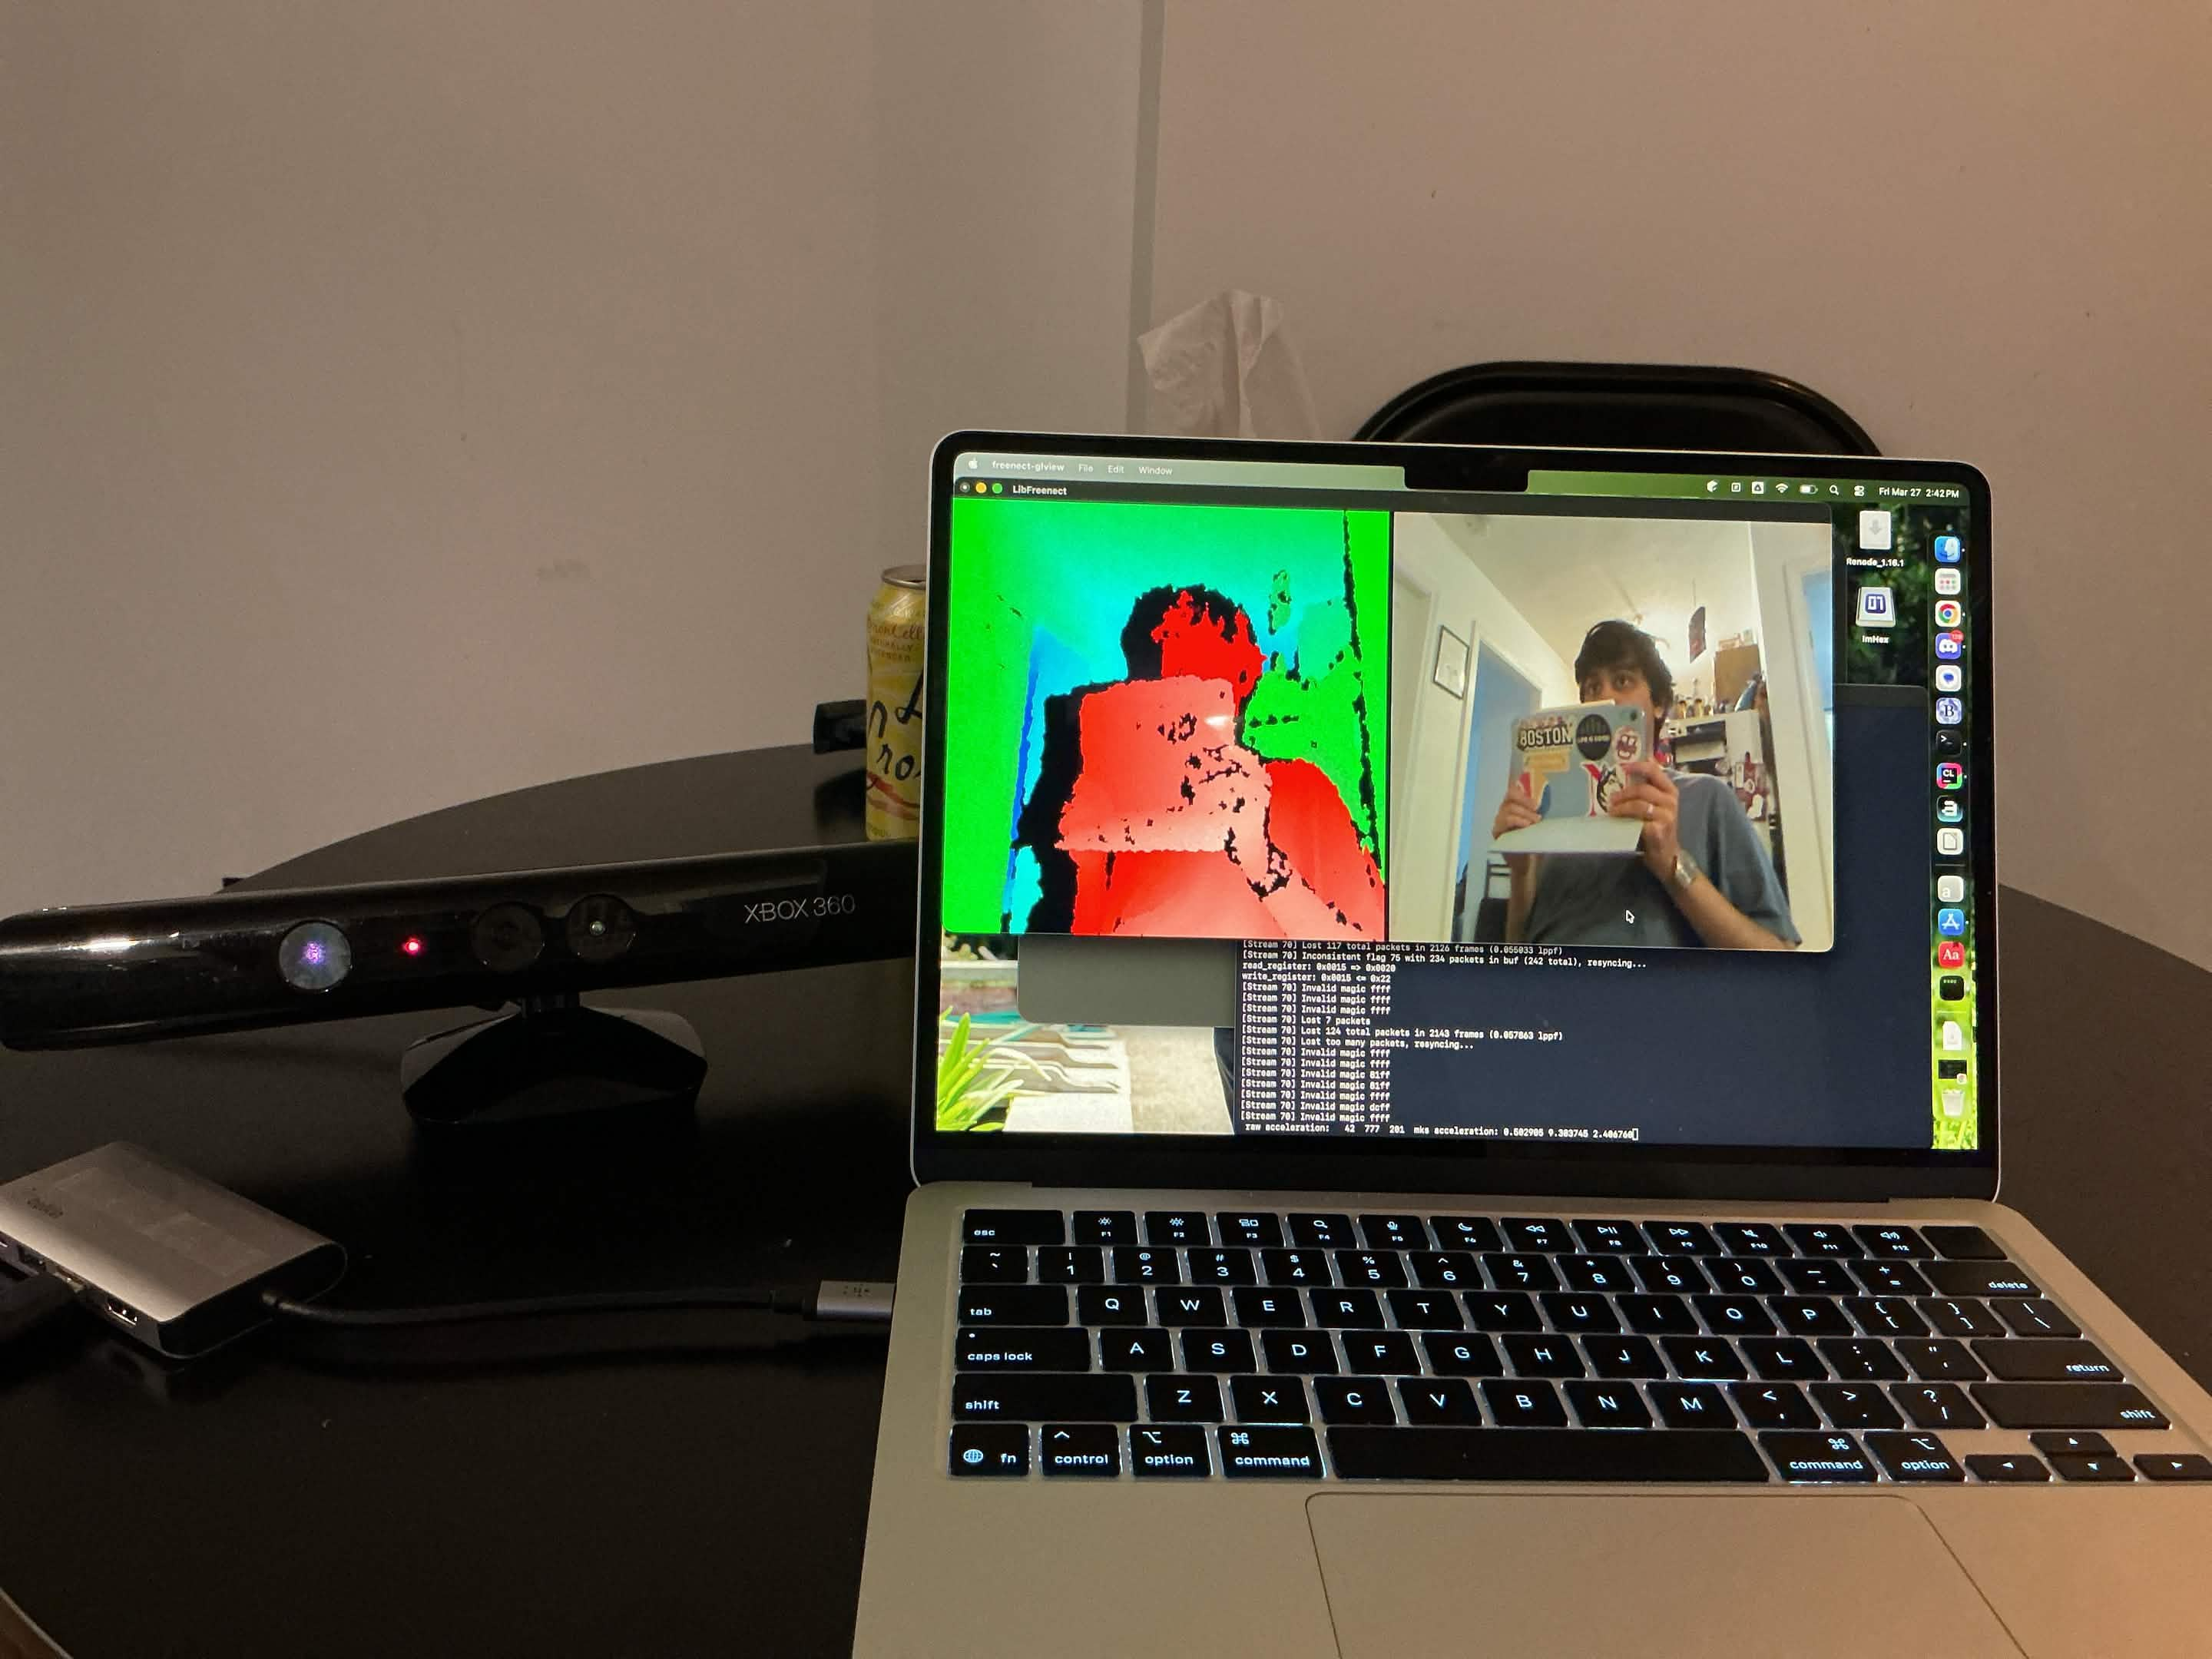
Once everything works, we can do an OOTB demo and get into our little experiment:
The above is an example of the basic OOTB demo from OpenKinect/libfreenect, which shows IR data, cameras, can adjust height of camera, and toggle to night camera.
Video version of the above + video version of the ASCII code discussed below + code available in the repository: suobset/freenect-demos.
The Real Problem
I initially wanted to do hand tracking, mainly inspired by the Apple Vision Pro. That idea lasted about 10 minutes.
The moment you go down that path, you’re dealing with segmentation, fingertips, pose estimation, calibration, and a bunch of failure modes you didn’t ask for.
So I stepped back and asked a simpler question:
What is the smallest stable signal I can extract from a Kinect depth frame?
Not “what is the hand”.
Just: what is closer than everything else, and how can we represent that in the simplest possible demo?
The Feed We Actually Get
The Kinect gives depth as a uint16_t buffer:
- 640 × 480
- 11-bit values
- range ~0–2047
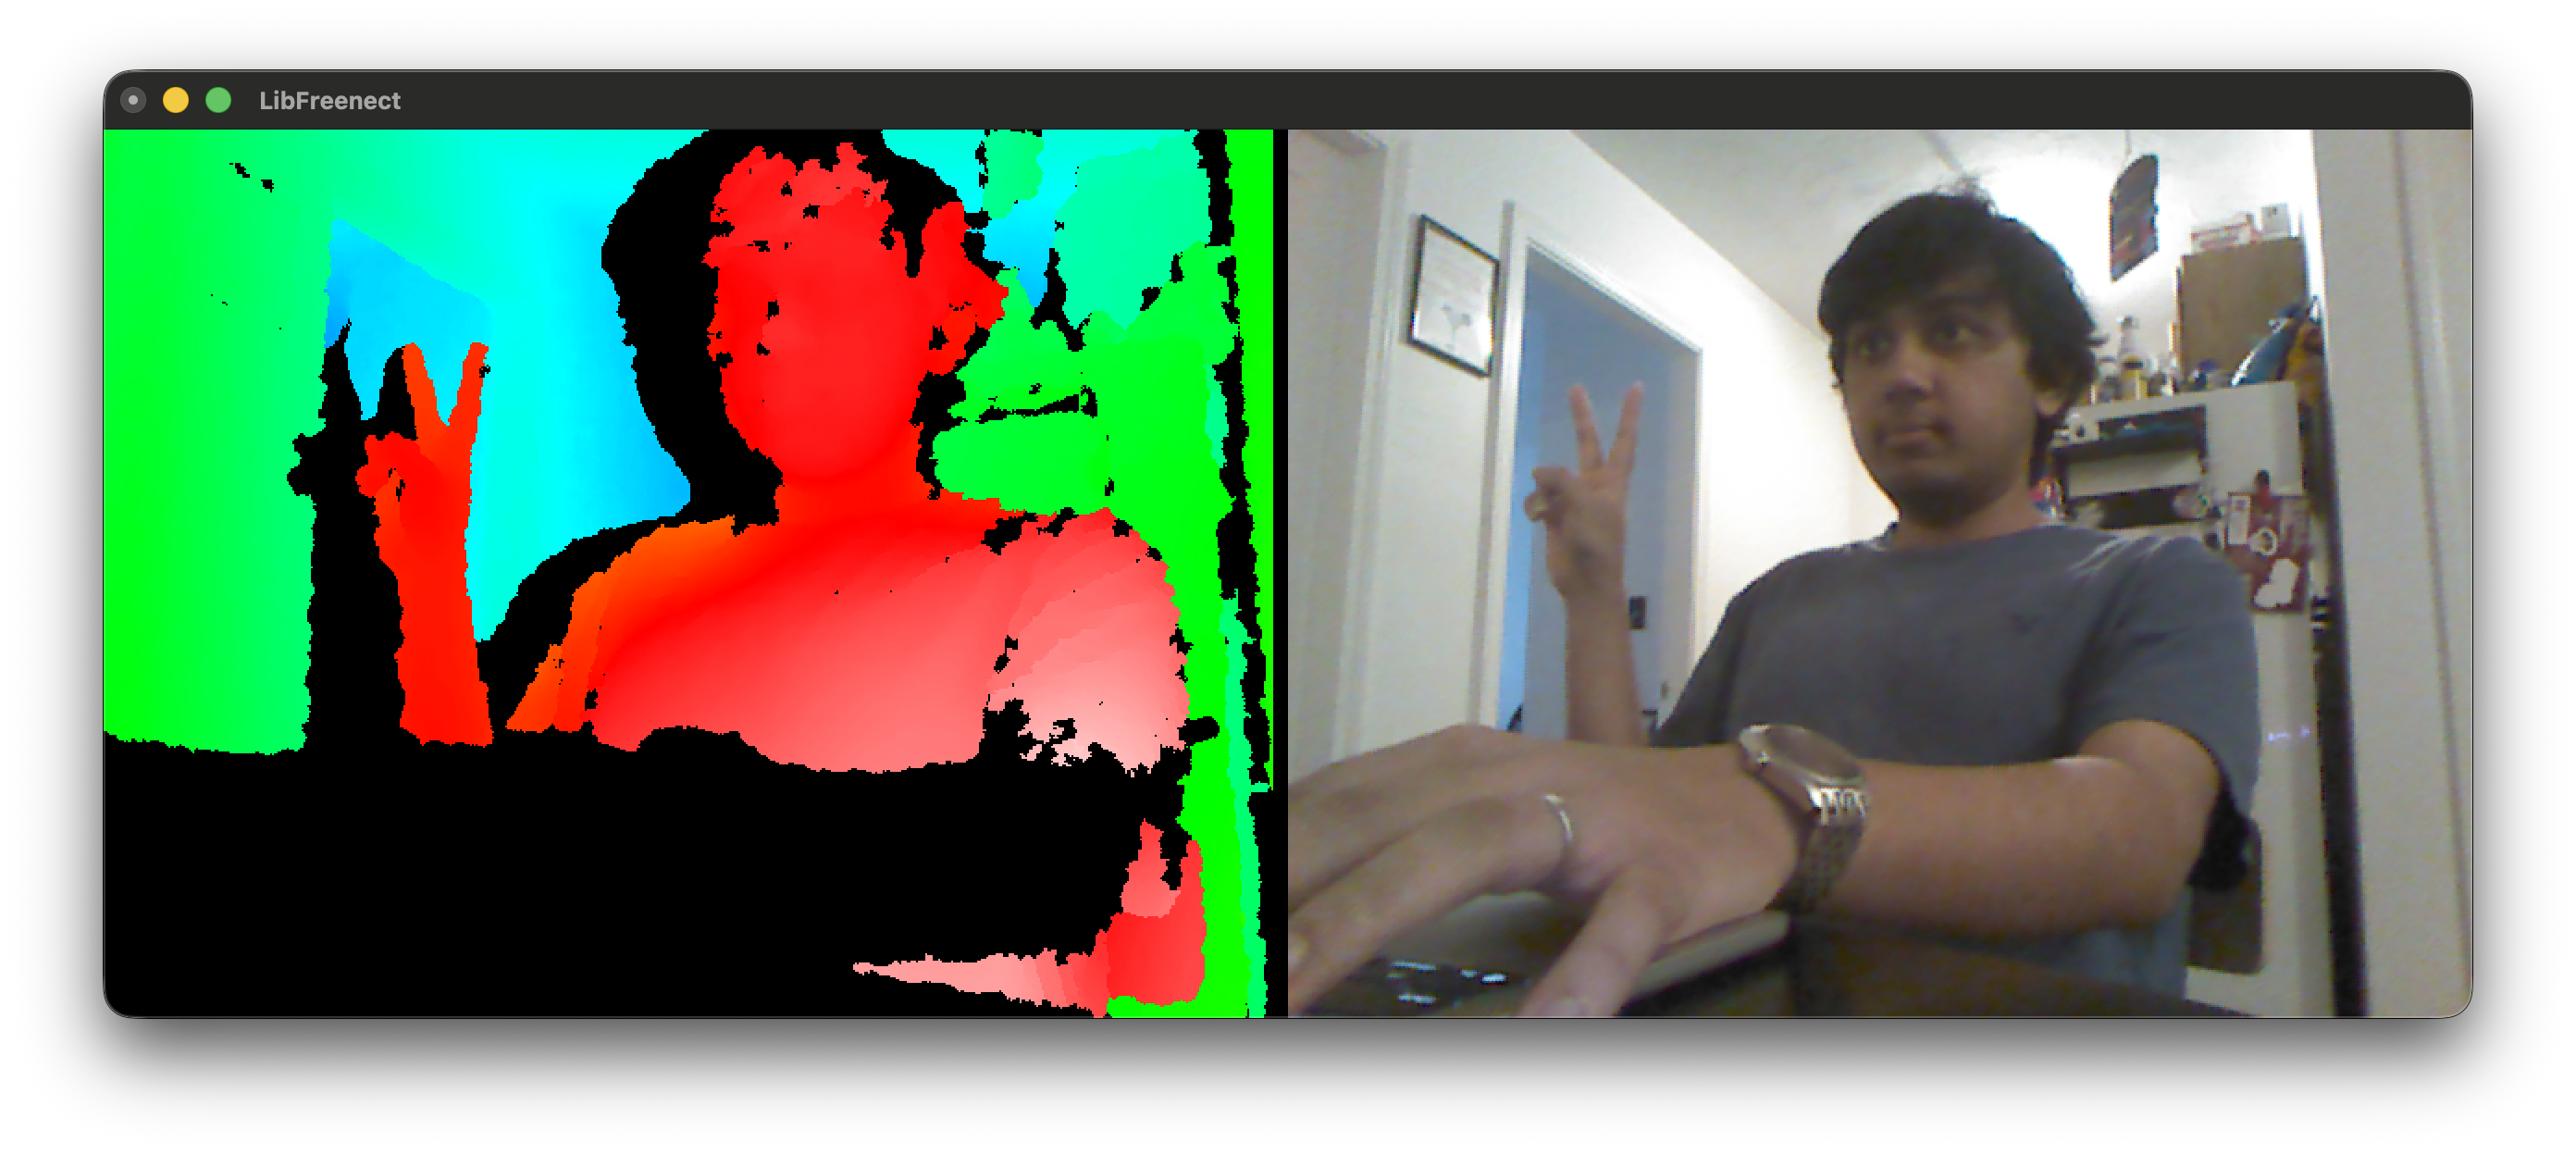
That’s it. The library does not return any semantics, or any object detection, or really anything much more. The OOTB demo proves that even more, you can toggle between the night mode and regular camera, adjust height, and record video. But those are not too important for us right now, and everything else is based on user interpretation.
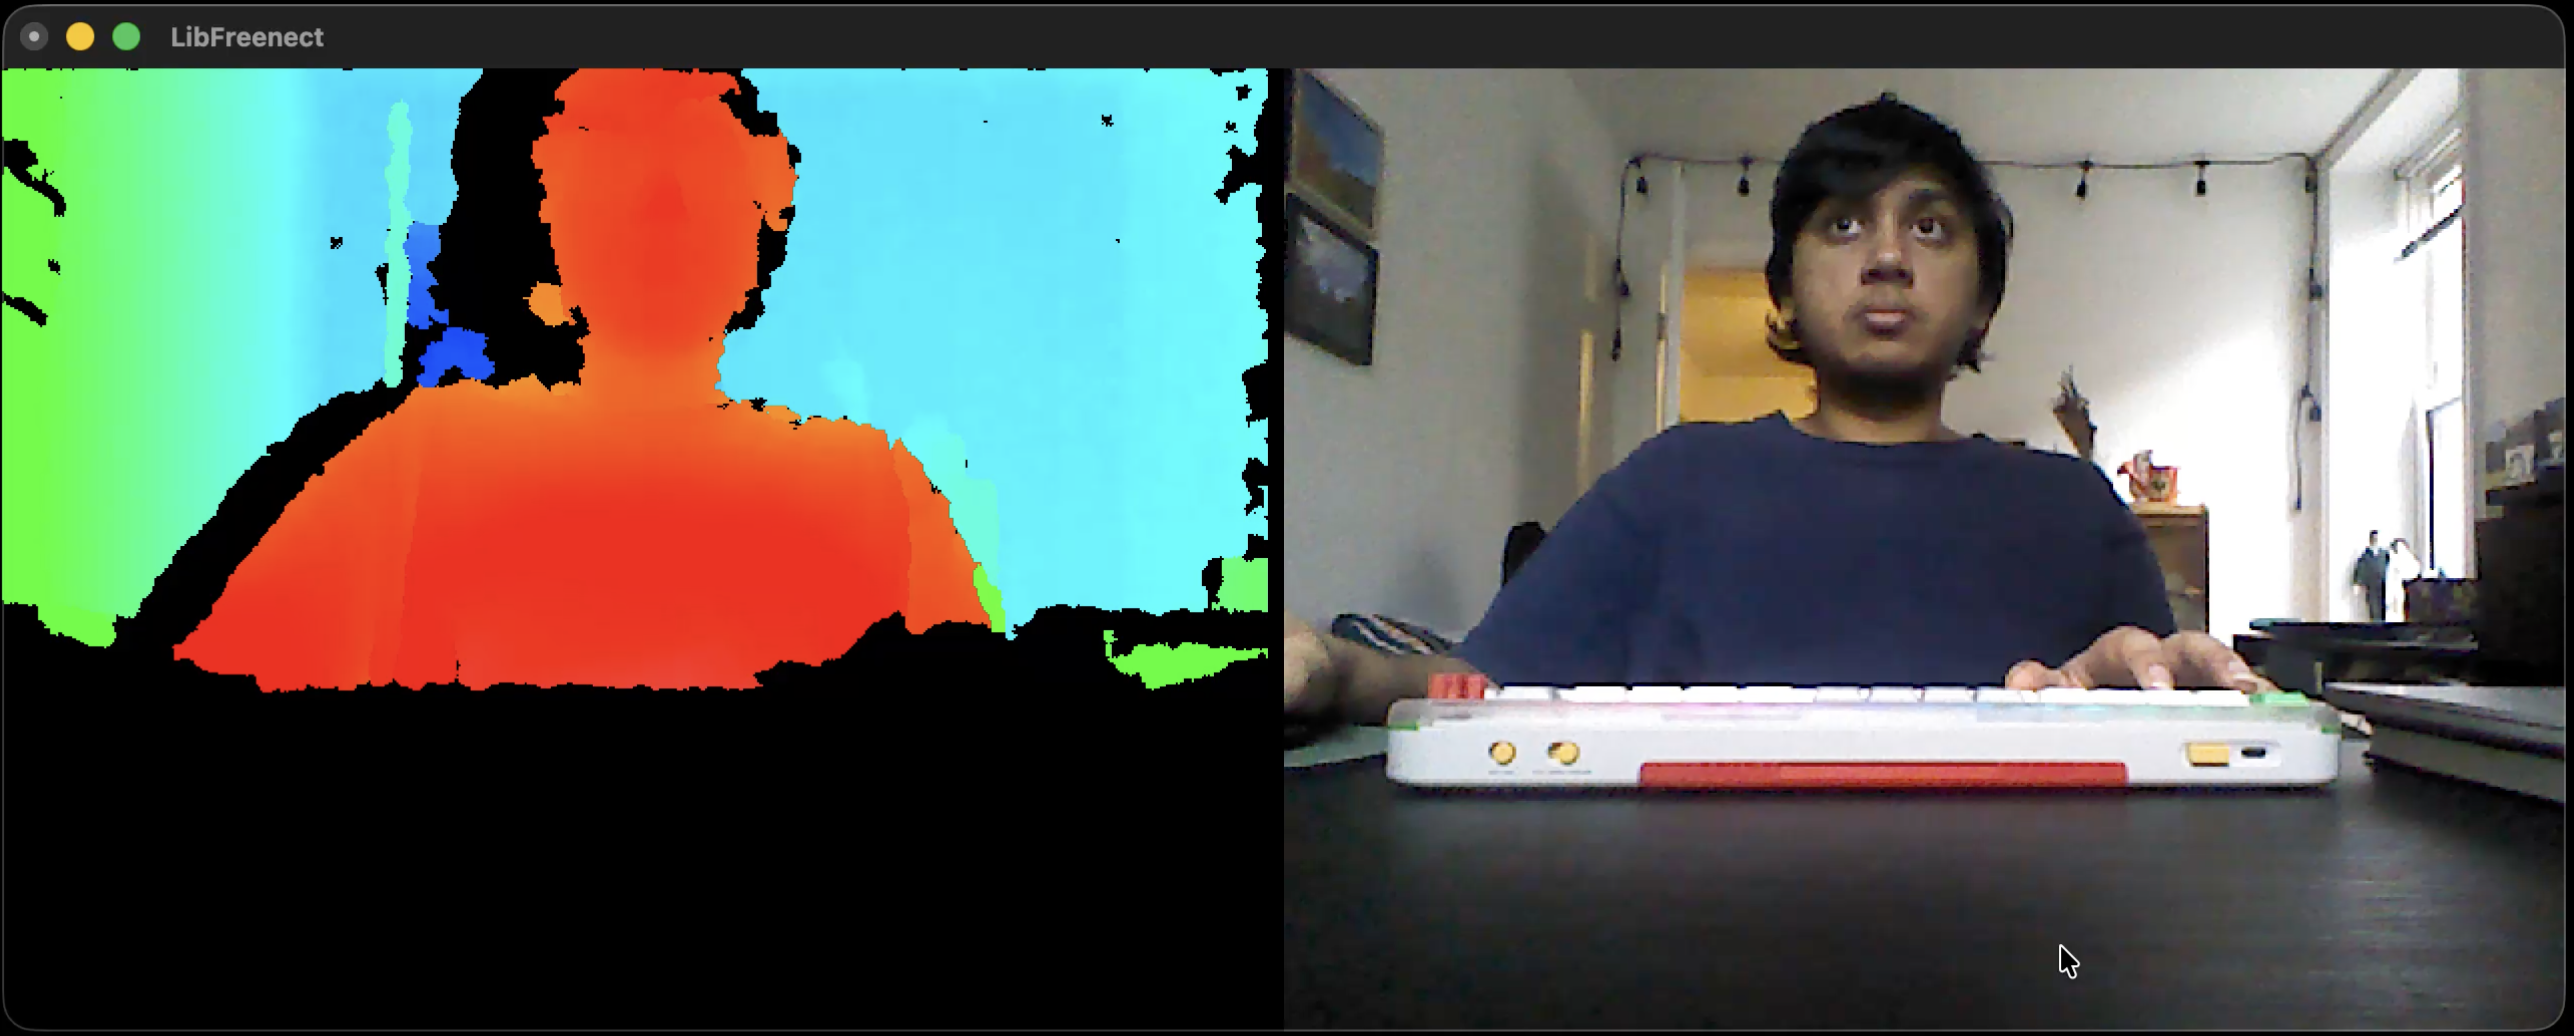
Normal Camera + IR OOTB Demo
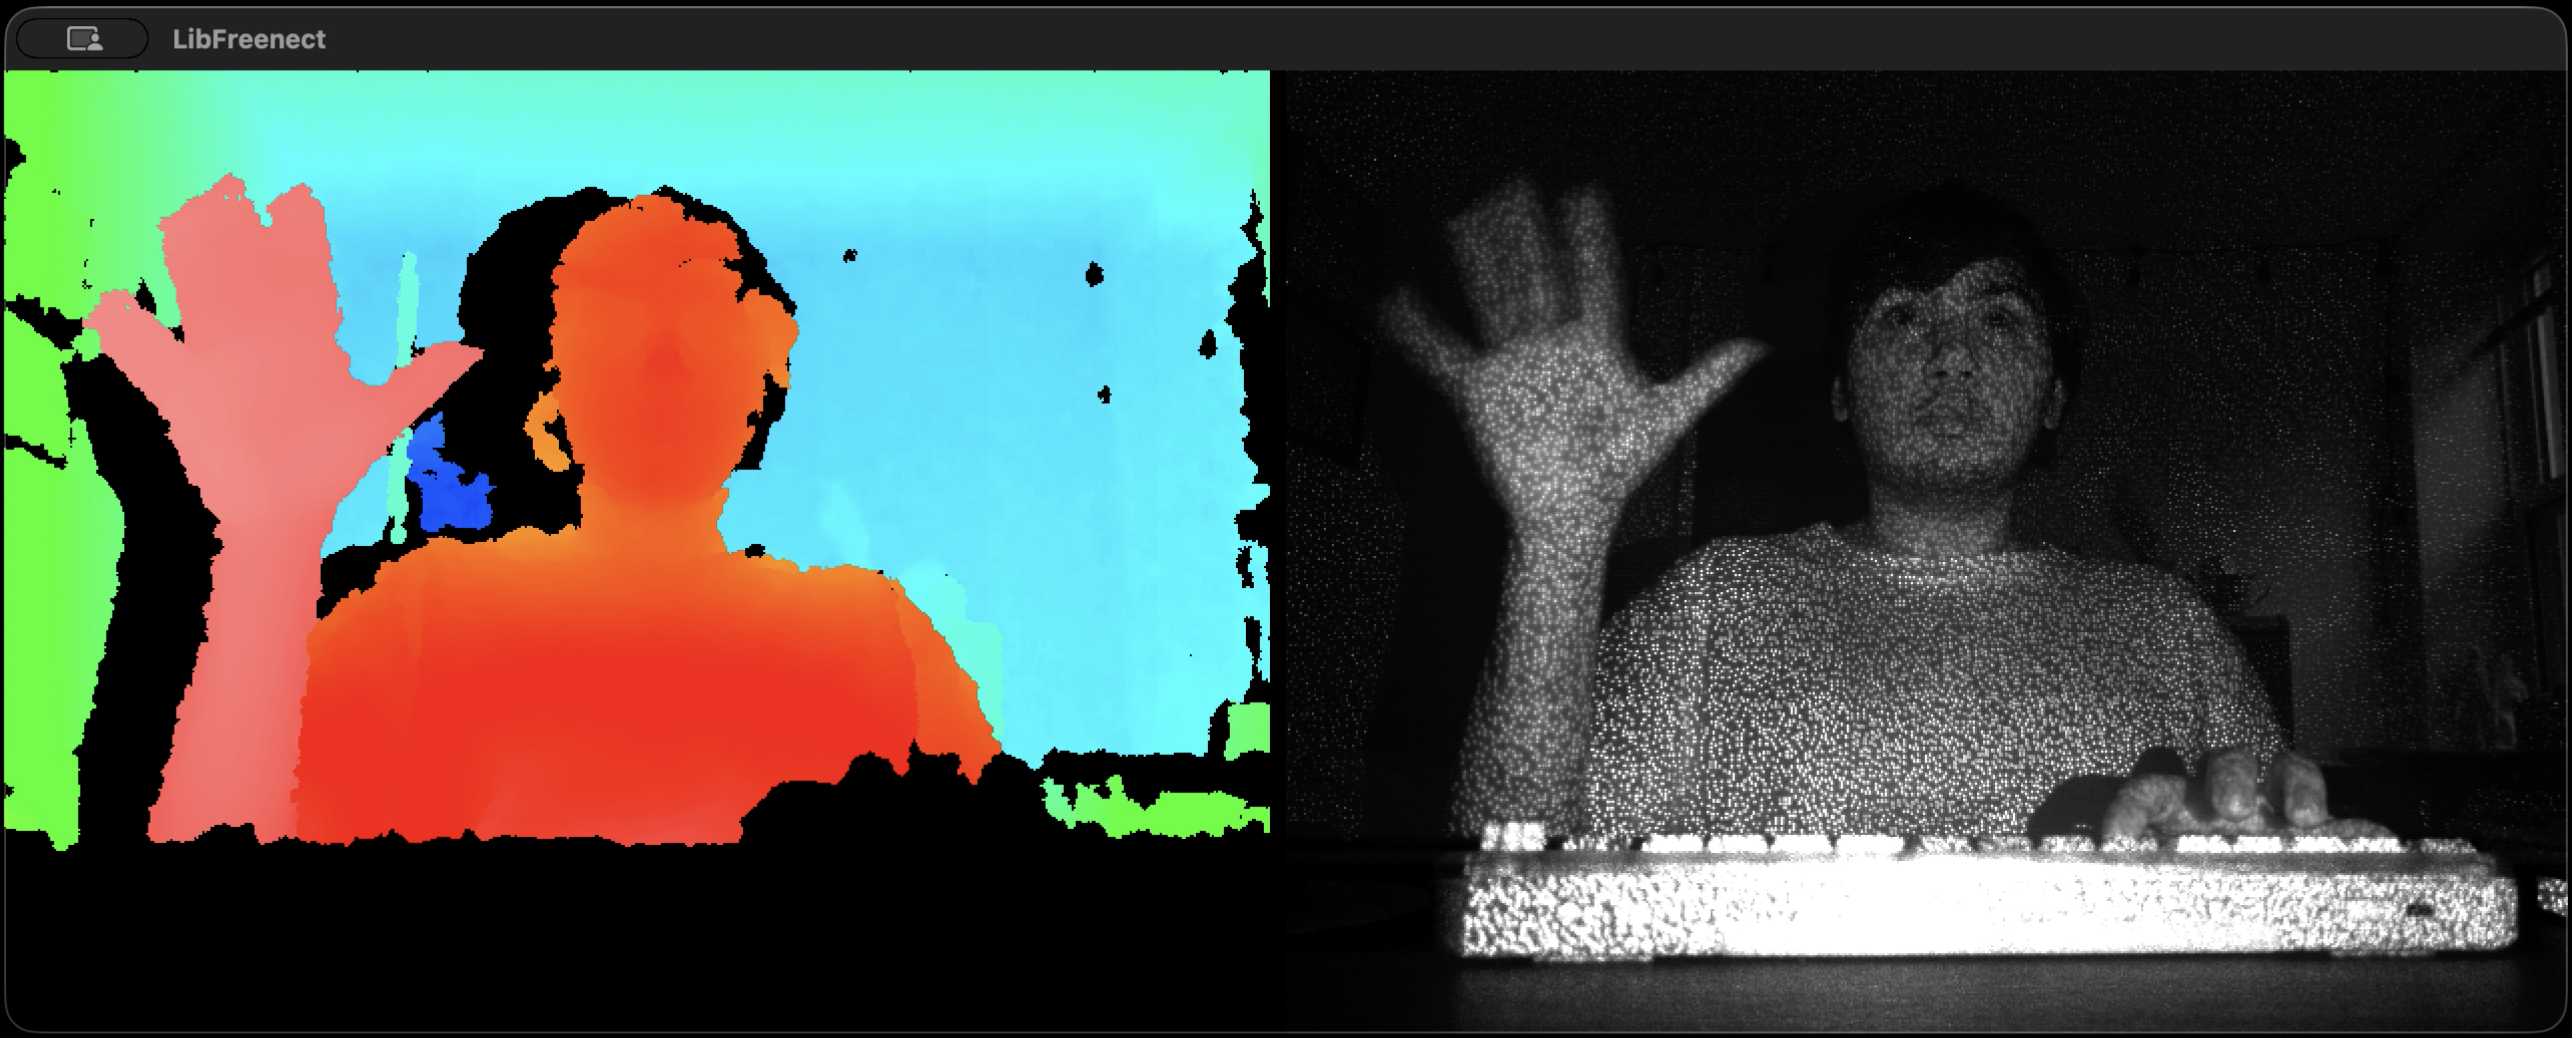
Night Camera OOTB Demo
Step 1: FrameGrabber (Don’t Fight the API)
The source code for
framegrabber.hppcan be found here.
libfreenect gives you callbacks. That sounds straightforward until you actually try to build something on top of it.
You don’t “ask” for a frame. You don’t have a loop that says “give me the next depth image”. Instead, libfreenect calls you whenever it has data, on its own thread, with a raw pointer that is only valid for that moment.
A minimal version looks like this:
void DepthCallback(void* depth, uint32_t timestamp) override {
  auto* data = static_cast<uint16_t*>(depth);

  // this is your only chance to use this frame safely
  // you did not request it
  // you do not control when the next one arrives

  ProcessDepth(data);
}
This flips the usual control flow.
Instead of:
while (true) {
  auto frame = GetFrame();
  Process(frame);
}
you are forced into:
// called whenever the device feels like it
void DepthCallback(...) {
  Process(...);
}
That becomes a problem as soon as you want anything even slightly structured:
- you can’t easily step through frames
- you can’t pause or control timing
- you can’t coordinate depth with anything else cleanly
- you don’t know if you’re mid-update when reading shared data
You are no longer driving the program. The device is.
So instead of letting that leak everywhere, I wrapped it.
class FrameGrabber : public Freenect::FreenectDevice {
 public:
  FrameGrabber(freenect_context* context, int index)
      : Freenect::FreenectDevice(context, index),
        depth_buffer_(
          freenect_find_depth_mode(
            FREENECT_RESOLUTION_MEDIUM,
            FREENECT_DEPTH_11BIT
          ).bytes / 2) {

    setDepthFormat(FREENECT_DEPTH_11BIT);
  }

  void DepthCallback(void* depth, uint32_t) override {
    auto* src = static_cast<uint16_t*>(depth);
    std::copy(
      src,
      src + (getDepthBufferSize() / 2),
      depth_buffer_.begin()
    );
  }

  bool GetLatestDepth(std::vector<uint16_t>& out) {
    if (depth_buffer_.empty()) return false;
    out = depth_buffer_;
    return true;
  }

 private:
  std::vector<uint16_t> depth_buffer_;
};
This does one thing:
turn async callbacks into a synchronous pull.
device.GetLatestDepth(depth);
That copy inside the callback is the whole trick.
It makes everything else boring. Which is exactly what you want.
Step 2: The Smallest Demo That Works
The source code for
kinect_depth_ascii.cppcan be found here.
First, we do some scaffolding to know our CLI constraints and define the ASCII palette we will be using:
  std::signal(SIGINT, HandleSignal);
  std::cout << "kinect_depth_ascii: terminal silhouette mode. Ctrl+C to quit.\n";

  Freenect::Freenect freenect;
  auto& device = freenect.createDevice<blog_demos::FrameGrabber>(0);
  device.setDepthFormat(FREENECT_DEPTH_11BIT);
  device.startDepth();

  constexpr int output_width = 80;
  constexpr int output_height = 30;
  const std::string palette = " .:-=+*#%@";
  std::vector<uint16_t> depth(blog_demos::kFrameWidth * blog_demos::kFrameHeight);
Then, we start with the loop:
while (!g_should_stop) {
  if (!device.GetLatestDepth(depth)) {
    std::this_thread::sleep_for(std::chrono::milliseconds(10));
    continue;
  }
}
At this point, you know:
- frames are coming in
- your wrapper works
Now you need to turn numbers into something visible.
Step 3: Raw Depth is Useless
If you just dump raw depth values, you do not get anything particularly meaningful. The background dominates the frame, the useful foreground signal gets buried, and nothing really stands out.
So the first real task is to throw most of that data away.
Step 3.1: Estimate a Near Plane
I reuse a helper:
const auto blob = blog_demos::FindForegroundBlob(depth, 180, 2);
This gives me the nearest “interesting” region in the current depth frame.
From that, I define a working depth band:
const int near_depth =
  blob.found ? static_cast<int>(blob.nearest_depth) : 700;

const int far_depth = std::min(2047, near_depth + 500);
Now I am no longer reasoning about the whole scene. I am reasoning about a slice of it.
That is the important shift.
Step 4: Keep Only That Slice
Once I have a near and far bound, the filtering becomes very simple:
if (value < near_depth || value > far_depth) {
  continue;
}
Everything outside that band is ignored.
This line does most of the work in the demo. Without it, the output is mostly noise and background. With it, the foreground starts behaving like a silhouette.
Step 5: What FindForegroundBlob Is Actually Doing
The source code for
frame_grabber.hppcan be found here.
FindForegroundBlob sounds more complicated than it really is.
As mentioned before, there is no segmentation model here, hand detector, semantic understanding of the frame, fancy AI, whatever.
It is just trying to answer a much smaller question:
what is the nearest coherent chunk of depth in this image?
The first pass builds a histogram over the depth values:
for (int y = 0; y < height; y += stride) {
  for (int x = 0; x < width; x += stride) {
    const uint16_t v = depth[y * width + x];
    if (v >= 350 && v < 1900) {
      histogram[v]++;
    }
  }
}
A few things are happening here:
- I do not scan every pixel
- I ignore values that are too close or too far to be useful
- I only want a rough estimate, not a perfect measurement
Then I walk the histogram cumulatively and stop once I cross a low percentile:
int cumulative = 0;
for (int d = 0; d < 2048; ++d) {
  cumulative += histogram[d];
  if (cumulative > threshold) {
    nearest = d;
    break;
  }
}
This is my estimate for the nearest believable depth in the scene.
After that, I collect points in a narrow band near that estimate and compute a weighted center:
if (value >= nearest && value <= nearest + band) {
  weighted_x += x;
  weighted_y += y;
}
And if the support is too weak, I reject it:
if (active_pixels < 250) {
  return {};
}
Step 6: Compress the Frame to Terminal Size
The Kinect gives me a 640×480 depth image. The terminal is nowhere near that.
So I need to divide the depth frame into coarse bins that map cleanly to characters:
const int x0 = col * width / output_width;
const int x1 = (col + 1) * width / output_width;
const int y0 = row * height / output_height;
const int y1 = (row + 1) * height / output_height;
Each output cell now represents a rectangular block of the original depth frame.
That is the entire spatial downsampling step.
Step 7: Aggregate the Depth Values in Each Cell
Once each character cell corresponds to a block of pixels, I average the valid depth values inside that block:
int valid = 0;
double total = 0.0;

for (...) {
  if (value < near_depth || value > far_depth) continue;
  total += value;
  valid++;
}
If no pixels in that region survive the depth filter, I print a blank:
if (valid == 0) {
  std::cout << ' ';
  continue;
}
This is why the output does not just become a wall of characters. Empty regions stay empty.
Step 8: Normalize the Averaged Depth
Now I have one average depth per terminal cell.
That needs to be mapped into a [0, 1] range before I can choose a character:
const double average = total / valid;

const double normalized =
  1.0 - ((average - near_depth) /
         std::max(1, far_depth - near_depth));
The inversion matters.
Closer points should get a denser character. Farther points should get a lighter one.
So after normalization:
- closer → larger value
- farther → smaller value
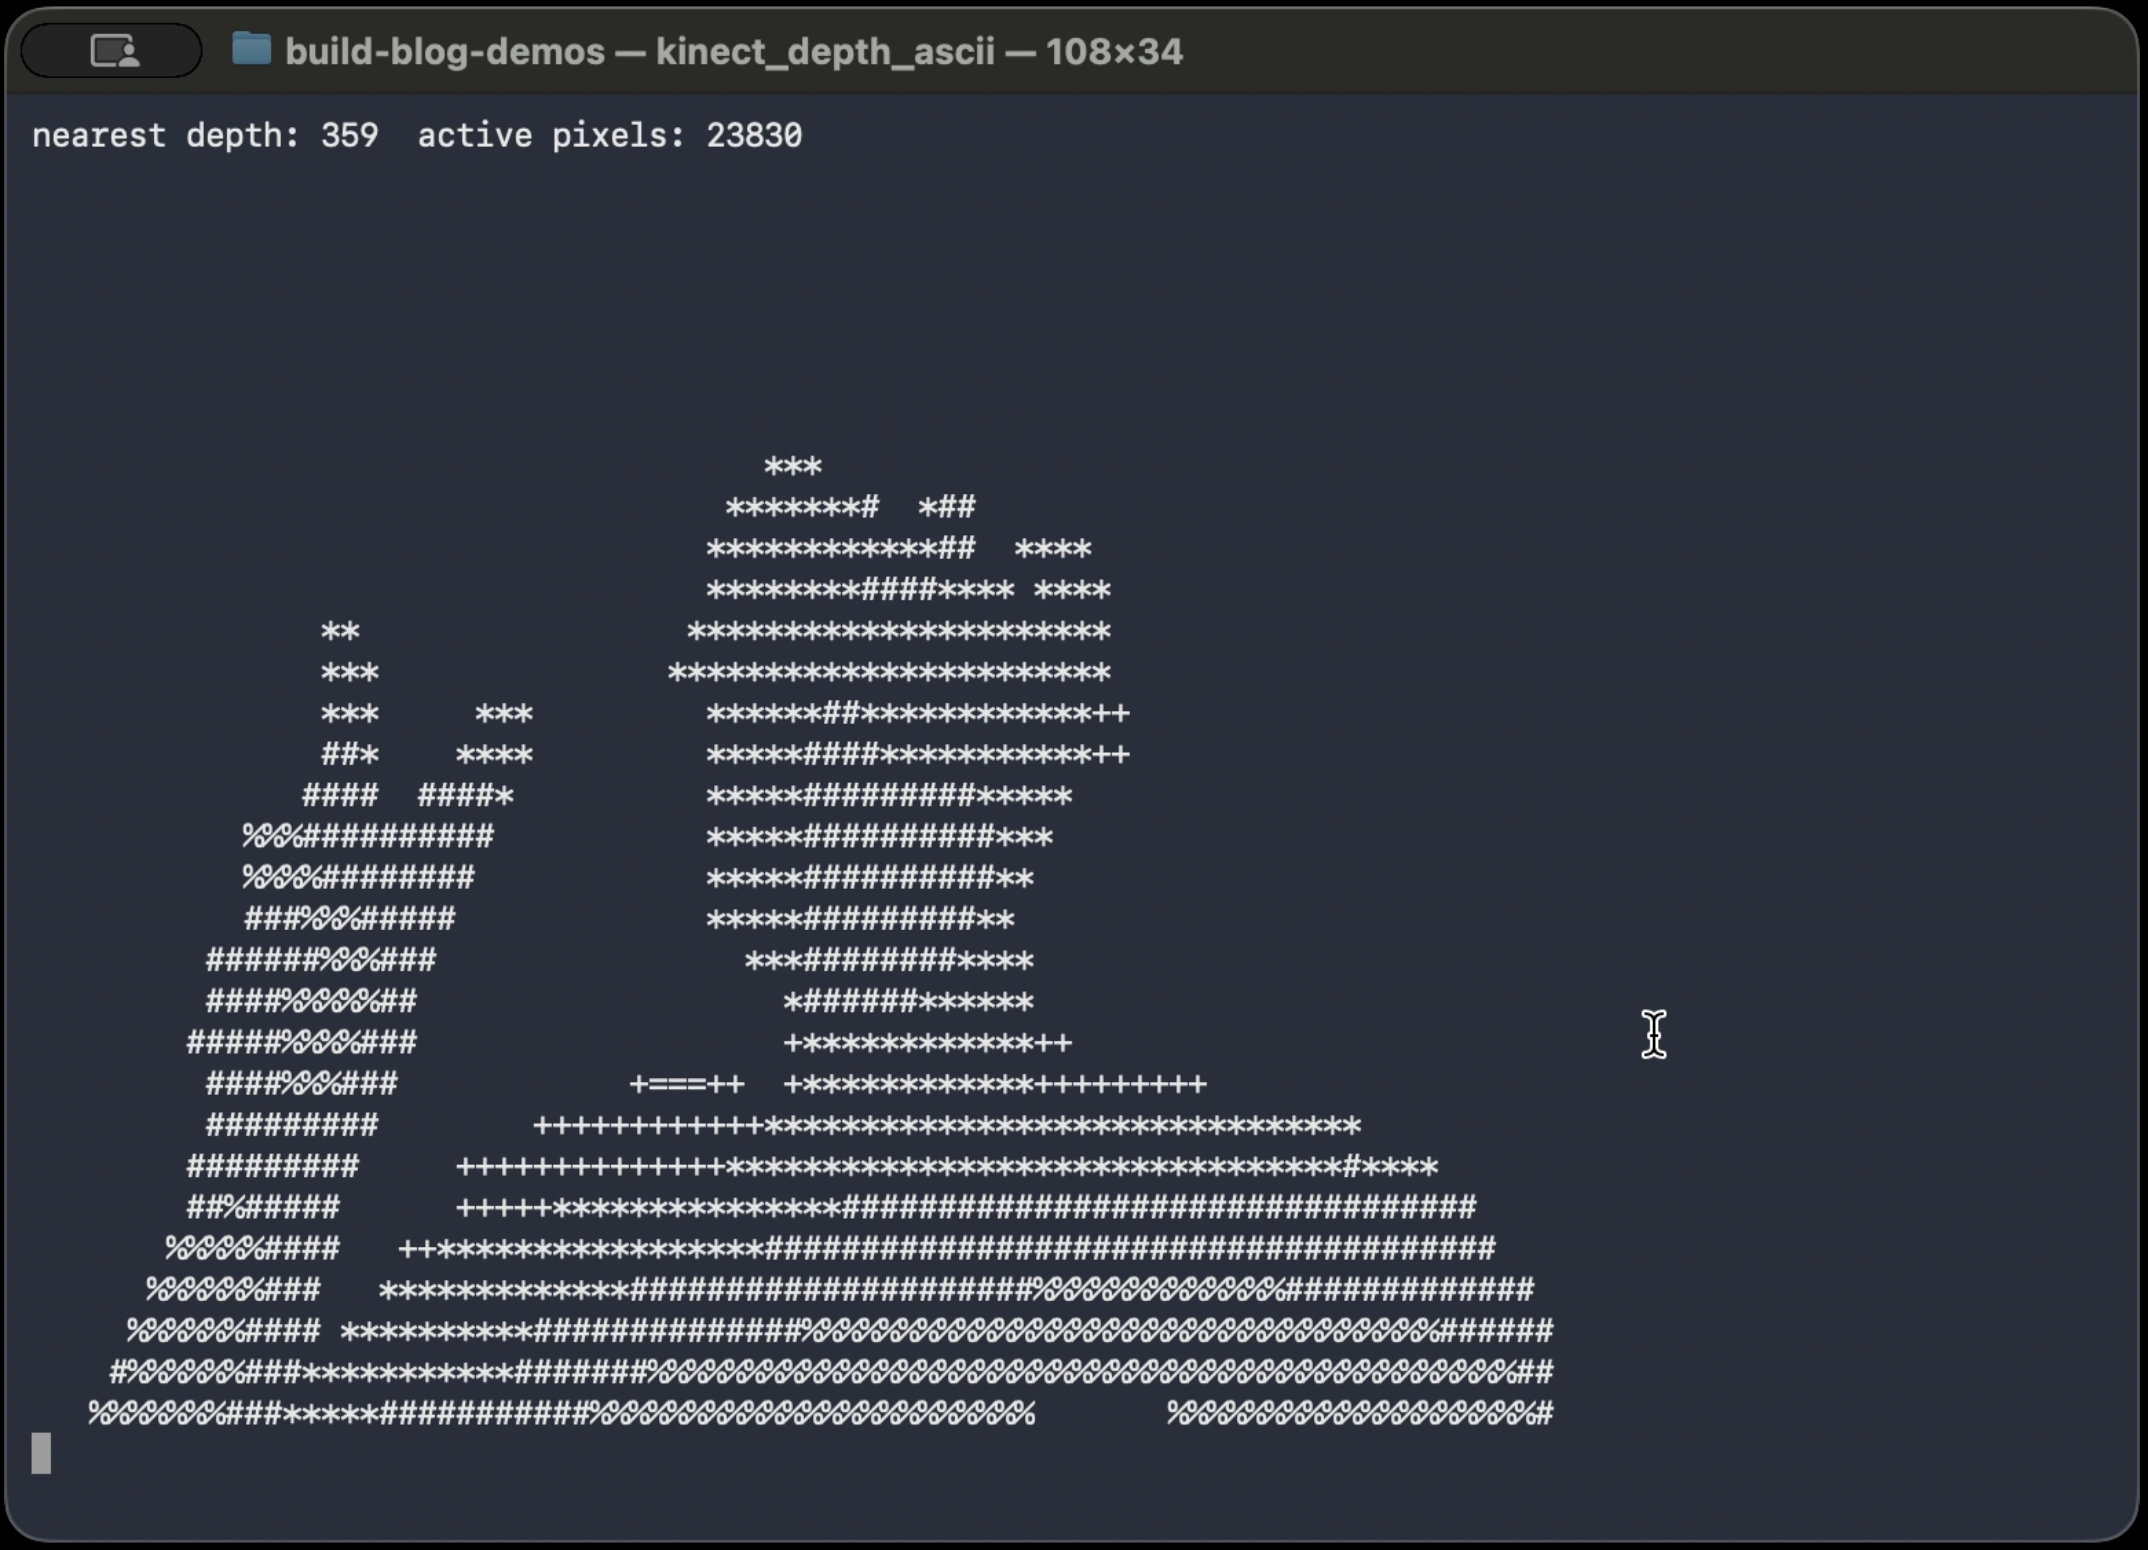
Step 9: Map Depth to ASCII
Then I map that normalized value into a palette:
const std::string palette = " .:-=+*#%@";

const std::size_t idx =
  blog_demos::Clamp(normalized, 0.0, 1.0)
  * (palette.size() - 1);

std::cout << palette[idx];
This palette is ordered from visually light to visually dense.
ASCII works here because character density does a decent job approximating brightness. It is a crude representation, but in a terminal that is good enough.
Step 10: Render the Frame
At the end of each iteration, I clear the screen and draw the whole thing again:
std::cout << "\x1b[2J\x1b[H";
That is just ANSI escape handling:
- clear the screen
- move the cursor back to the top-left corner
Then the next frame gets printed in place.
Clear screen. Redraw. Repeat.
Full Loop
while (!g_should_stop) {
  if (!device.GetLatestDepth(depth)) continue;

  const auto blob = blog_demos::FindForegroundBlob(depth, 180, 2);
  const int near_depth = blob.found ? blob.nearest_depth : 700;
  const int far_depth = std::min(2047, near_depth + 500);

  std::cout << "\x1b[2J\x1b[H";

  for (int row = 0; row < output_height; ++row) {
    for (int col = 0; col < output_width; ++col) {
      ...
      std::cout << palette[idx];
    }
    std::cout << '\n';
  }

  std::cout.flush();
  std::this_thread::sleep_for(std::chrono::milliseconds(33));
}
What It Looks Like
The video version of the ASCII demo, OOTB demo, and some more info is available here
What Breaks
- no band → flat image
- fixed depth → only works at one distance
- too wide band → background noise
- too narrow → flicker
But, we are not trying to understand everything. All that we are trying to do is ask “what is closer than everything else right now?”. For a small, contained demo, this is more than enough.